Multiple Environments and Importing
Sliderule supports importing workflow versions across environments. This lets you maintain separate Development and Production environments of Sliderule, with separate data source credentials and user accounts.
Terminology
- Source Environment - the environment you’re pulling a version from. Typically your Development environment
- Destination Environment - the environment your importing a version into. Typically your Production environment
Importing Across Environments
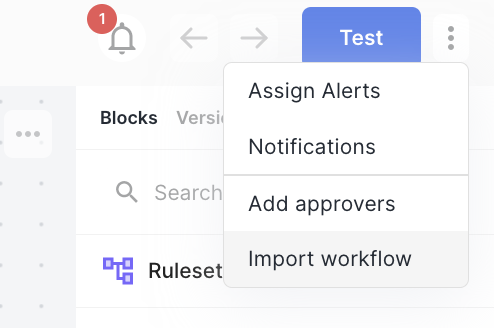
From inside your Destination environment, select the workflow you'd like to import into (or create a new one). Then, from inside that workflow, click on the triple dot menu in the top bar to access Workflow level settings. Then click Import Workflow.
There are three steps to the import process:
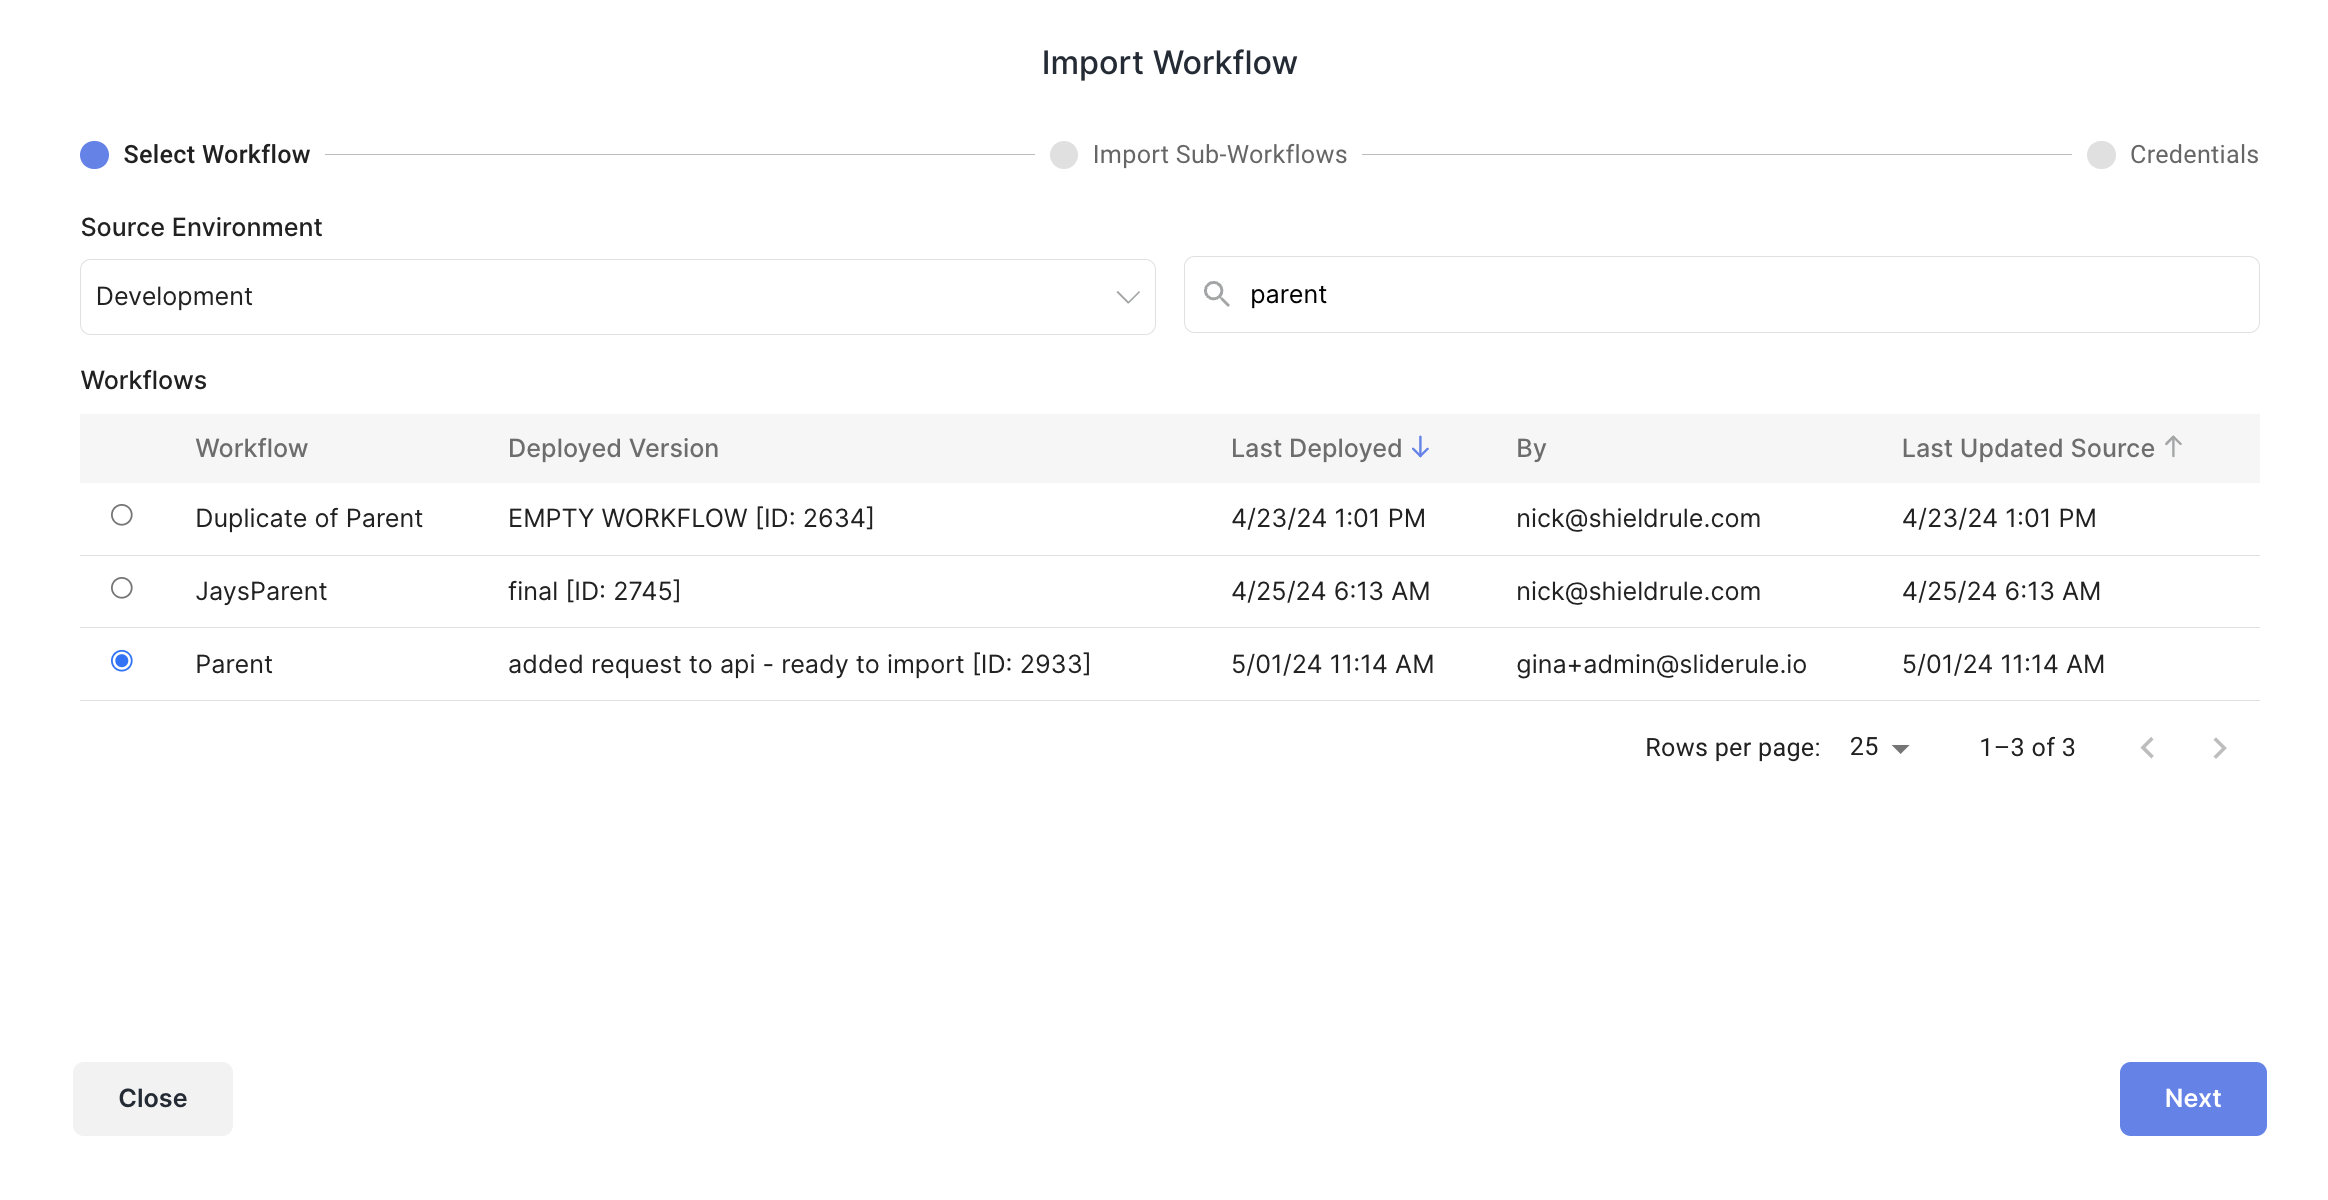
- Select the Source Environment from the dropdown, and then select the Workflow you’d like to import. For each workflow, you'll have the option to import its currently deployed version in the lower environment (e.g. if you're on your Production environment, you can import the currently deployed version of each workflow on your Development environment)
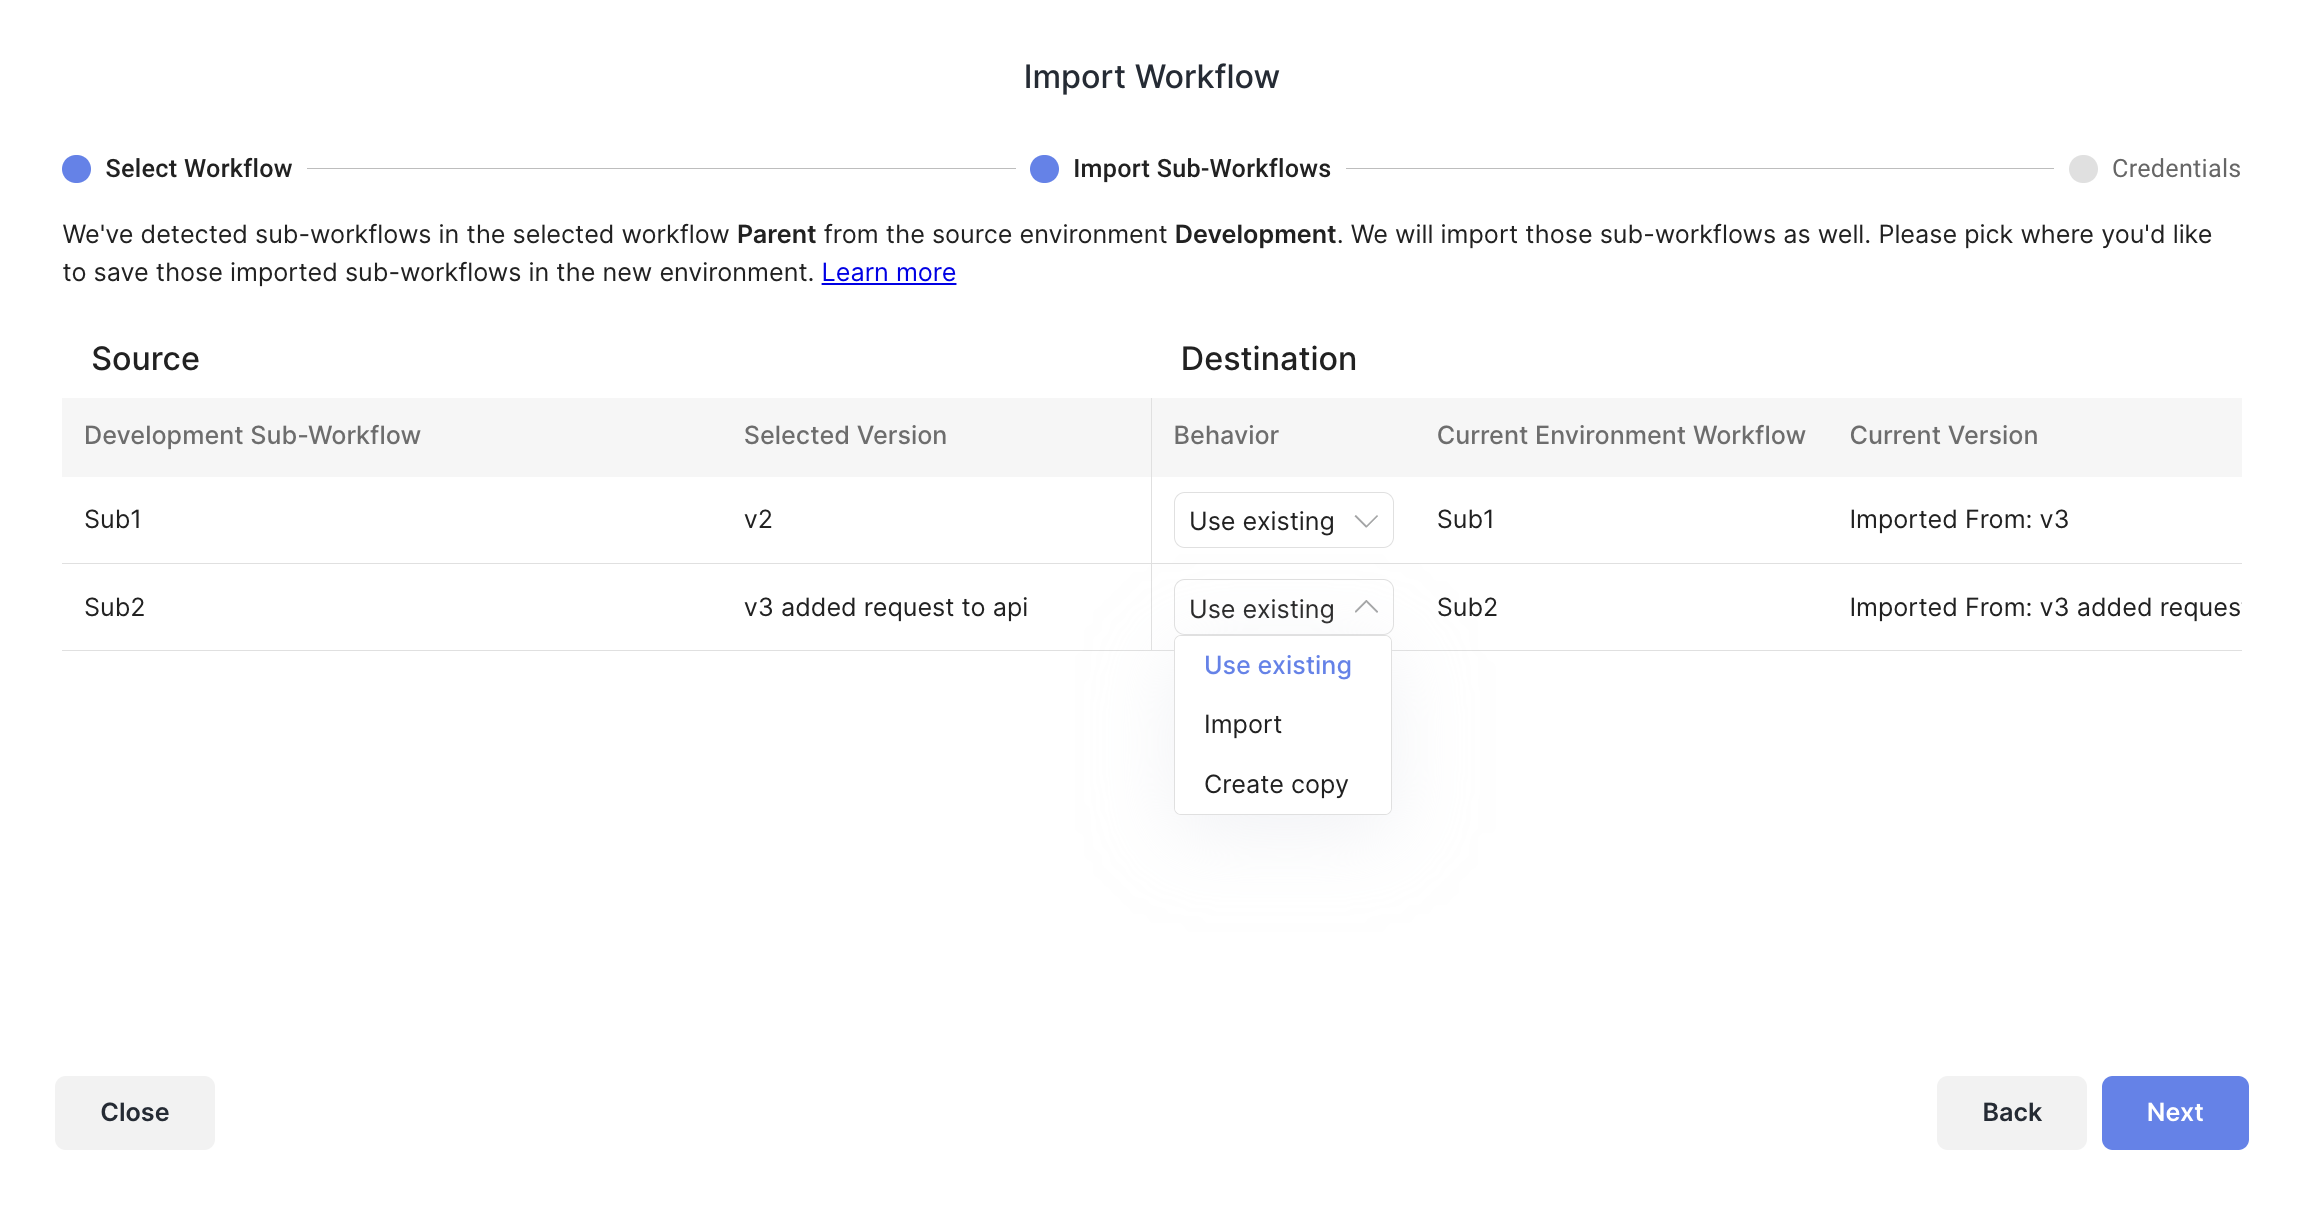
- If your workflow contains Subworkflows, you'll need to confirm where you'll be importing those subworkflows to in the Destination environment. You have three potential options under the Behavior drop down for each Subworkflow:
- Create a Copy will create a new copy of the subworkflow as new workflow in the Destination Environment
- Update Version (prev. Import) (most common) will import the selected version of the subworkflow into the selected workflow on the destination environment. If you've imported a subworkflow before, Sliderule defaults to wherever it was imported to last time.
- Use Existing will use an existing version of the subworkflow. This is only available if the exact version of the imported subworkflow is detected in the Destination Environment.
- If your workflow uses Data Connectors, Sliderule will attempt to match Credentials in the Destination Environment with the Credentials required for each Logic Block in the Workflow you’re importing. If there are any Credentials we can’t find a good match for, you’ll see a red warning icon, and you'll need to pick a Credential to use before proceeding.

You can alter the Credentials from the automated suggestions, and once you have Credentials selected for each requirement, click the blue Import button.
That’s it! All done!
Two Important Reminders:
-
versions are not automatically Deployed after import. You’ll have to follow the standard Deploy process in the Destination Environment
-
imports will overwrite any changes you’ve made in your Destination Environment
Updated 12 months ago